Black Bottom Cupcakes: Creamy and Decadent
- Time: 10 min active + 25 min baking = Total 35 min
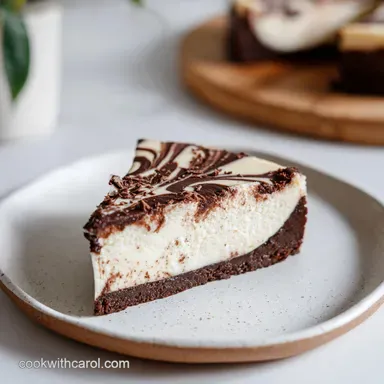
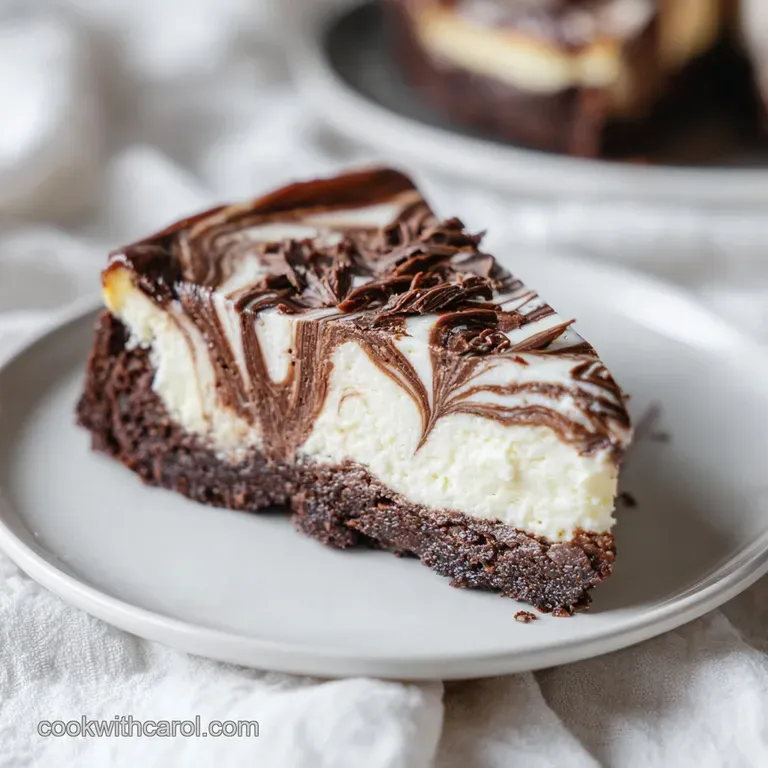
- Flavor/Texture Hook: Tangy cream cheese meets a fudgy, mahogany chocolate cake with bursts of melted chocolate.
- Perfect for: Weekend bake offs, birthday parties, or when you need a high impact dessert that doesn't require frosting.
- Black Bottom Cupcake with Cream Cheese Chocolate Chip Swirl
- The Secret to Layering
- The Building Blocks
- Equipment Needed
- Ingredients & Substitutes
- Key Steps
- Avoiding Kitchen Disasters
- Troubleshooting Common Issues
- Mix It Up
- Adjusting the Batch Size
- Storage and Zero Waste
- Common Baking Beliefs
- Perfect Complements
- Recipe FAQs
- 📝 Recipe Card
You know that smell when you open the oven and the scent of toasted cocoa hits you, but there's this underlying tang of baked cream cheese? That's the magic right there. I remember the first time I tried these, but I didn't use room temperature cream cheese.
I just popped it in the microwave for a few seconds, and it ended up lumpy. The cheesecake layer didn't set right, and instead of a clean "bottom," the layers just bled into each other, creating a muddy, grayish mess that looked nothing like the pictures.
It was honestly a bit of a disaster. I had these "mud cupcakes" that were too sweet in some spots and strangely rubbery in others. I realized then that with a Black Bottom Cupcake with Cream Cheese Chocolate Chip Swirl, you can't take shortcuts with the temperature of your fats.
If the cream cheese isn't genuinely soft, the batter won't emulsify, and you lose that velvety mouthfeel.
Once I stopped rushing the prep and focused on the temperature, everything changed. Now, these are my go to when I want something that feels like a fancy bakery find but only takes about half an hour in the oven.
You get a concentrated burst of cheesecake and chocolate in every single bite, and because they're self frosting, you don't have to deal with the mess of piping bags or waiting for buttercream to cool.
Black Bottom Cupcake with Cream Cheese Chocolate Chip Swirl
Let's get into the details of why these actually work. When you're making a Black Bottom Cupcake with Cream Cheese Chocolate Chip Swirl, you're essentially baking two different desserts in one liner.
The challenge is making sure the cake doesn't swallow the cheesecake, and the cheesecake doesn't turn into a rubbery puck.
The key is the density. The cream cheese mixture is heavier and denser than the chocolate batter. By placing the cheesecake layer at the bottom, it acts as a sturdy foundation. As the cake rises around it, the two layers bond but stay distinct.
Adding the mini chocolate chips into the cheese layer provides these little pockets of melted cocoa that break up the richness of the cream cheese.
Right then, let's talk about the chocolate part. Using buttermilk is a non negotiable here. The acid in the buttermilk reacts with the baking soda to create those tiny air bubbles that keep the cake from becoming a brick.
It gives the chocolate a slight tang that mirrors the cream cheese, making the whole thing feel cohesive rather than just "sugar on sugar."
The Secret to Layering
Before we jump in, you need to understand how the heat affects these different layers. Because the cheesecake is denser, it needs the direct heat of the pan to set, while the cake needs a bit more room to breathe and rise.
- Density Balance
- The cream cheese mixture is thicker, which prevents it from mixing entirely into the lighter cake batter.
- Acidic Lift
- Buttermilk reacts with baking soda to create a fluffy crumb that supports the heavy cheese base.
- Temperature Sync
- Using room temperature eggs prevents the fats from seizing, ensuring a silky texture.
- Chip Distribution
- Mini chips stay suspended in the cheese rather than sinking to the very bottom of the liner.
Since we're talking about the best way to get that texture, I've found that the method of heating makes a huge difference. While these are traditional oven bakes, some people try to "steam" cheesecake style desserts on a stovetop. Here is how they compare.
| Method | Time | Texture | Best For |
|---|---|---|---|
| Oven Baking | 25 mins | Spongy cake, set cheesecake | Traditional cupcakes |
| Stovetop Steam | 45 mins | Dense, custard like | No oven households |
I always stick to the oven for this recipe because you get those slightly caramelized edges on the cake that you just can't get from steaming. It's that contrast between the toasted cake edge and the creamy center that makes it work.
The Building Blocks
I've spent a lot of time thinking about the ingredients here. For instance, if you're looking for something even more indulgent, you might look at sugar free cheesecake bars for inspiration on how to handle cream cheese textures without all the sugar. But for this version, we're going full decadence.
| Ingredient | Science Role | Pro Secret |
|---|---|---|
| Cream Cheese | Structural Base | Must be 65°F+ to avoid lumps |
| Buttermilk | Tenderizer | Adds a subtle tang and creates lift |
| Cocoa Powder | Flavor/Acid | Sift it to avoid "cocoa bombs" |
| Mini Chips | Texture Pop | Use mini chips so they don't weigh down the swirl |
For the chocolate part, I highly recommend using a high-quality Dutch processed cocoa powder. It's less acidic and has a deeper, darker color, which gives the cupcakes that dramatic "black bottom" look. If you're curious about how different flours affect the rise, King Arthur Baking has some great guides on protein content in all purpose flour.
Equipment Needed
You don't need a professional kitchen for this, but a few specific tools make it a lot easier. I usually use a stand mixer such as KitchenAid for the cream cheese, but a hand mixer works just as well.
First, you'll need a standard 12 slot or 24 slot cupcake tin. I always use paper liners because the cream cheese can sometimes stick to the pan, and nobody wants to scrub burnt cheesecake off a metal tin. A medium sized whisk is essential for the dry ingredients to ensure there are no clumps of baking soda.
For the swirling, don't overthink it. A simple toothpick or a thin butter knife is all you need. The goal is a figure eight motion, not a complete blend. If you mix them too much, you lose the visual contrast and the distinct flavor profiles of the two layers.
Ingredients & Substitutes
Here is everything you need. Please be precise with the measurements, especially the baking soda, or your cupcakes might taste metallic.
For the Cream Cheese Filling:
- 8 oz cream cheese, softenedWhy this? Provides the creamy, tangy structure
- 1/2 cup granulated sugarWhy this? Sweetens the cheese without making it runny
- 1 large eggWhy this? Acts as a binder for the cheesecake layer
- 1 tsp vanilla extractWhy this? Rounds out the tang of the cheese
- 1/3 cup mini semi sweet chocolate chipsWhy this? Adds texture and bursts of chocolate
For the Chocolate Cake:
- 1 1/2 cups all purpose flourWhy this? Standard structure for a sturdy cupcake
- 1/2 cup unsweetened cocoa powderWhy this? Deep chocolate flavor
- 1 cup granulated sugarWhy this? Sweetness and moisture retention
- 1 tsp baking sodaWhy this? Reacts with buttermilk for the rise
- 1/2 tsp saltWhy this? Enhances the chocolate notes
- 1 cup buttermilkWhy this? Tenderizes the crumb
- 1/2 cup vegetable oilWhy this? Keeps the cake moist longer than butter
- 1 large eggWhy this? Provides structure and lift
- 1 tsp vanilla extractWhy this? Enhances the overall aroma
Substitution Table
| Original Ingredient | Substitute | Why It Works |
|---|---|---|
| Buttermilk (1 cup) | 1 cup milk + 1 tbsp lemon juice | Mimics acidity. Note: Let sit for 5 mins first |
| Vegetable Oil (1/2 cup) | Melted Coconut Oil (1/2 cup) | Similar fat content. Note: Adds a subtle coconut hint |
| Mini Chocolate Chips | Finely chopped chocolate bar | Same flavor. Note: May melt faster into the swirl |
| All Purpose Flour | 1:1 gluten-free Flour Blend | Works for GF needs. Note: Texture will be slightly grainier |
Wait, if you're in a rush and don't have buttermilk, that lemon juice trick is a life saver. Just make sure you let it curdle a bit before adding it to the oil and egg.
Key Steps
Let's get these in the oven. I like to think of this in three phases: the creamy core, the chocolate base, and the final assembly.
Preparing the Creamy Core
- Beat the softened cream cheese and sugar together using a medium speed until completely smooth. Note: If you see lumps, keep beating; don't add more liquid.
- Incorporate the egg and vanilla extract into the cream cheese mixture, mixing only until combined. Note: Over mixing here introduces air, which can cause the cheesecake to puff up and then collapse.
- Gently fold in the mini chocolate chips using a spatula. Note: Use a folding motion to keep the chips evenly distributed.
Mixing the Cocoa Base
- In a large bowl, whisk together the flour, cocoa powder, sugar, baking soda, and salt to remove lumps. Note: Sifting the cocoa powder is a great habit here.
- Stir in the buttermilk, oil, egg, and vanilla until the batter is mahogany colored and glossy. Note: Stop stirring as soon as the flour streaks disappear to avoid a tough cake.
Assembling and Swirling
- Spoon approximately 1 tablespoon of the cream cheese mixture into the bottom of each lined cupcake tin. Note: Try to keep the amounts even so they bake at the same rate.
- Carefully dollop the chocolate batter over the top of the cream cheese layer until each cup is 3/4 full. Note: Leave a little room for the rise.
- Use a toothpick or knife to lightly swirl the two batters together in a figure eight motion. Note: Don't over swirl, or you'll just have a marbled cake instead of a black bottom.
- Bake at 350°F (175°C) for 22–25 minutes until the edges are set and a toothpick inserted into the cake portion comes out clean.
Chef's Note: To get that professional look, don't fill the liners to the brim. If they overflow, the cheesecake layer can actually leak out the sides and stick to the pan. 3/4 full is the magic number.
Avoiding Kitchen Disasters

Even for experienced bakers, these can be tricky. The most common issue I see is the "sunken center," where the middle of the cupcake dips in after it comes out of the oven. This usually happens because the oven door was opened too early, letting out the heat and causing the structure to collapse.
Troubleshooting Common Issues
| Issue | Solution |
|---|---|
| Why Your Cheesecake Is Rubbery | If the bottom layer feels like a eraser, you've likely over beaten the eggs into the cream cheese. This creates too many air bubbles that expand and then pop, leaving a dense, rubbery texture. Keep yo |
| Why Your Batter Is Lumpy | Lumps in the chocolate batter usually mean the cocoa powder wasn't whisked well with the flour. If you find lumps after adding the wet ingredients, don't keep stirring that will overwork the gluten. I |
| Why the Layers Merged | If the cheesecake completely mixed with the cake, your cream cheese might have been too warm, or you over swirled the batter. The cream cheese should be soft but still hold its shape. Troubleshootin |
Common Mistakes Checklist
- ✓ Used room temperature eggs and cream cheese to prevent curdling.
- ✓ Sifted the cocoa powder to avoid bitter clumps.
- ✓ Used a figure eight motion for the swirl, not a circular stir.
- ✓ Checked for doneness with a toothpick in the cake part, not the cheese.
- ✓ Allowed cupcakes to cool in the pan for 5 mins before moving.
Mix It Up
While the Black Bottom Cupcake with Cream Cheese Chocolate Chip Swirl is a classic, you can easily tweak this for different moods. If you're craving something a bit more citrusy, you can add a teaspoon of lemon zest to the cream cheese mixture. It cuts through the richness of the chocolate beautifully.
Adding a Nutty Crunch
If you want some texture, fold 1/4 cup of finely crushed pecans or walnuts into the chocolate batter. The nuttiness pairs perfectly with the cocoa. Just make sure the pieces are small so they don't disrupt the swirl.
Swapping for White Chocolate
Replace the semi sweet mini chips with white chocolate chips. This creates a "Cookies and Cream" vibe that is a huge hit with kids. Since white chocolate is sweeter, you might want to reduce the sugar in the cheesecake layer by one tablespoon.
Using a Cake Mix Shortcut
If you're in a huge rush, you can use a box of chocolate cake mix for the top layer. Just follow the box instructions but replace the water with buttermilk for a better flavor. Honestly, the scratch made version is better, but we all have those days where we just need a treat in 30 minutes.
If you love the cream cheese element but want something less heavy, you might enjoy a simple no bake cheesecake for a summer alternative.
Adjusting the Batch Size
Scaling these isn't as simple as doubling everything because of the way they bake in the tin. If you're making a smaller or larger batch, keep these rules in mind.
Scaling Down (Half Batch): When making 10 cupcakes, you'll need to beat one egg and use only half of it (about 2 tablespoons). Use a smaller pan or leave gaps between the liners in a large pan. Reduce the baking time by about 20%, checking them at the 18 minute mark.
Scaling Up (Double Batch): For 40 cupcakes, don't just double the baking soda and salt increase them to 1.5x first, then taste the batter if you're unsure. Work in batches so the batter doesn't sit too long and lose its lift.
If you're baking two trays at once, lower the temperature to 325°F (160°C) and extend the time by 5-7 minutes to ensure even heat distribution.
Decision Shortcut
- If you want a fudgier cake, replace 1/4 cup of flour with cocoa powder.
- If you want a tangier bottom, add 1 tablespoon of sour cream to the cheese mix.
- If you want a cleaner swirl, chill the cream cheese mixture for 15 mins before spooning.
Storage and Zero Waste
Since these contain cream cheese, they can't just sit on the counter forever. At room temperature, they'll stay fine for about 24 hours, but after that, the fridge is mandatory.
Storage Guidelines: Store your cupcakes in an airtight container in the fridge for up to 5 days. To keep them from drying out, place a piece of parchment paper between layers if you're stacking them.
When you're ready to eat, you can enjoy them cold, or pop them in the microwave for 10 seconds for a "molten" chocolate chip experience.
Freezing Tips: These freeze surprisingly well. Wrap each cupcake tightly in plastic wrap and place them in a freezer bag. They'll last for about 3 months. To thaw, leave them in the fridge overnight. Don't thaw them on the counter, or you might get condensation on the cake, making it soggy.
Zero Waste Ideas: If you have a bit of cream cheese mixture left over, don't throw it away! Spread it on a piece of toast or use it as a dip for apple slices. If you have leftover buttermilk, it's the perfect base for pancakes or a marinade for chicken.
Common Baking Beliefs
There are a few things people always say about black bottom cupcakes that aren't actually true. Let's clear those up.
One big myth is that you have to use a water bath (bain marie) to prevent the cheesecake from cracking. While that's true for a full sized cheesecake, it's unnecessary for cupcakes. The small volume of batter and the protection of the cake layer on top keep the cheese moist enough.
Another common misconception is that you should use butter instead of oil for a "richer" cake. In this specific recipe, oil is actually superior. Butter can make the cake slightly denser, but oil ensures the crumb stays velvety and moist, even when stored in the fridge.
Perfect Complements
A Black Bottom Cupcake with Cream Cheese Chocolate Chip Swirl is quite rich, so you want to pair it with something that cleanses the palate. A sharp, cold glass of milk is the classic choice, but a strong, unsweetened espresso or a dark roast coffee is even better.
The bitterness of the coffee cuts right through the creaminess of the cheese.
If you're serving these at a party, try pairing them with fresh berries. A few raspberries or a slice of strawberry on top adds a bright, acidic note that balances the deep chocolate.
For a full dessert spread, these go great alongside something lighter. If you're doing a brunch, maybe serve them with a side of Strawberry French Toast Bake recipe for a theme of "sweet and tangy" treats.
Right then, you're all set. Just remember to take your time with the cream cheese temperature and don't over swirl. You've got this! Trust the process, watch for those set edges, and enjoy every single bite of these decadent treats.
Recipe FAQs
Why is the cream cheese layer rubbery?
You likely over beat the eggs into the cream cheese. This creates excess air bubbles that expand and pop, leaving a dense, eraser like texture.
Why is my chocolate batter lumpy?
The cocoa powder wasn't whisked well enough with the flour. Ensure all dry ingredients are fully combined before stirring in the buttermilk and oil to avoid lumps.
How to swirl the batters without over mixing?
Use a toothpick or knife to draw a light figure eight motion. Do this gently so the two colors remain distinct rather than merging into one batter.
Can I leave these cupcakes on the counter?
Only for about 24 hours. Since they contain cream cheese, they must be stored in an airtight container in the fridge after the first day.
Do these cupcakes freeze well?
Yes, they freeze surprisingly well. When reheating, pop one in the microwave for 10 seconds to get a molten chocolate chip experience.
Is it true that the layers will always merge during baking?
No, this is a common misconception. The layers stay separate as long as you carefully dollop the chocolate batter on top of the cream cheese base.
What is a good side to serve with these rich cupcakes?
A zesty, fresh salad balances the richness of the chocolate and cream cheese. A Southwest chipotle salad provides a perfect acidic contrast to the sweet dessert.
Black Bottom Cheesecake Cupcakes