Black Chocolate Cake: Rich and Moist
- Time:20 minutes prep + 30 minutes cook + 1 hour 10 minutes cooling/frosting = 110 minutes total
- Flavor/Texture Hook: Intense, earthy cocoa with a velvety, moist crumb
- Perfect for: Elegant dinner parties, "Goth" themed birthdays, or moody holiday celebrations
- The Secret Logic Behind This Intense Cocoa Bloom
- Essential Numbers for the Perfect Bake
- Sourcing the Best Ingredients for Deep Color
- The Only Tools Needed for Success
- Step-by-Step Guide to the Perfect Crumb
- Solving Common Baking Hurdles and Texture Issues
- Creative Ways to Personalize Your Dark Dessert
- Best Practices for Freezing and Long-Term Storage
- Elegant Ways to Garnish Your Finished Cake
- Recipe FAQs
- 📝 Recipe Card
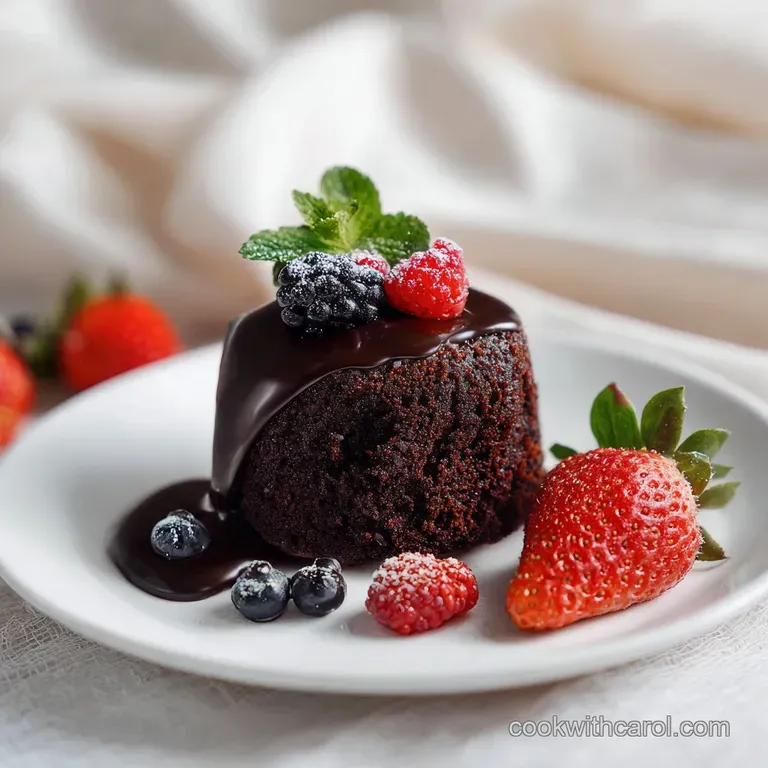
Imagine a winter solstice dinner where the table is lit only by flickering white tapers. The centerpiece isn't a floral arrangement, but this: a Black Chocolate Cake so dark it looks like a piece of midnight velvet.
I first made this for my sister’s 30th birthday, a "Funeral for her Youth" themed party, and the room went dead silent when I carried it out. It was strikingly beautiful against the white plates, almost like an art piece.
But the real magic happened when we sliced into it. You expect it to be bitter or dry because of that intense color, but it’s actually the most tender, moist cake I've ever pulled out of my oven.
We spent the rest of the night talking about how it tasted like a sophisticated version of those dark sandwich cookies we all loved as kids. It’s not just a dessert, it’s a mood, and honestly, it’s one of those recipes that makes you feel like a professional pastry chef with very little actual effort.
The beauty of this recipe is that it’s surprisingly approachable. You don’t need to be an expert in tempering chocolate or folding delicate egg whites. It’s a "bowl and whisk" kind of cake, which is my favorite kind because it means less cleanup and more time enjoying the aroma of blooming cocoa filling the house.
If you’ve been looking for a "wow factor" dessert that actually delivers on texture and flavor, we are about to become very good friends.
The Secret Logic Behind This Intense Cocoa Bloom
The deep, obsidian color and incredible moisture of this Black Chocolate Cake aren't accidental. It comes down to how we treat the ingredients, especially that specific cocoa powder. Unlike standard natural cocoa, which is acidic, we are using a heavy hitter that changes the way the batter behaves.
- Alkalization Intensity: Black cocoa is ultra Dutched, meaning it has a neutral pH. This creates the dark color but requires a balance of baking powder and soda to ensure the cake actually rises.
- The Boiling Liquid Bloom: Adding boiling water directly to the cocoa powder dissolves any stubborn clumps and "wakes up" the flavor oils trapped inside the solids.
- Buttermilk Tenderization: The acidity in the buttermilk breaks down gluten strands, ensuring the crumb is velvety rather than bready or tough.
- Fat Suspension: Using oil instead of butter keeps the cake moist even when cold, as oil remains liquid at room temperature while butter solidifies.
| Method | Time | Texture | Best For |
|---|---|---|---|
| Fast (Oil Based) | 50 mins | Springy, moist, light | Weeknights or tall layer cakes |
| Classic (Creamed Butter) | 75 mins | Dense, pound cake style | Carved cakes or heavy decor |
| Coffee Infused | 50 mins | Richer, mocha undertones | Ultimate chocolate enthusiasts |
Choosing the oil based method for this specific recipe is what gives us that signature "squish" factor. While a creamed butter cake has its place, the oil allows the flavor of the black cocoa to sit front and center without being masked by heavy dairy fats.
It also means this cake stays fresh for days, which is a massive win if you like to prep ahead.
Essential Numbers for the Perfect Bake
Before we get our hands messy, let’s look at the hard data. I’m a big believer in knowing exactly what you’re getting into so you can plan your kitchen flow. There’s nothing worse than realizing your cake needs to cool for an hour when the guests are already pulling into the driveway.
| Metric | Target Value | Visual or Sensory Cue |
|---|---|---|
| Oven Temp | 350°F (175°C) | Steady heat for a flat, even rise |
| Internal Temp | 205°F - 210°F | A toothpick comes out with only a few moist crumbs |
| Pan Prep | 2 x 8 inch rounds | Lined with parchment to prevent the dreaded "stick" |
| Resting Time | 10 minutes in pan | The structure sets so the cake doesn't crack |
It is worth noting that while this cake looks sophisticated, it is fundamentally a variation of a "black magic" cake. If you enjoy experimenting with different textures in your baking, you might also find my Simple No Bake Cheesecake a fun contrast to this deep, baked crumb. Both offer that "wow" visual appeal but with completely different technical approaches.
Sourcing the Best Ingredients for Deep Color
The quality of your black cocoa is the single most important factor here. Look for brands that label it as "Ultra Dutched" or "Black Cocoa Powder." It should look like crushed Oreo cookies, not light brown powder.
If you use regular Hershey's natural cocoa, you'll still get a good cake, but it won't have that iconic obsidian look or that specific earthy flavor.
- 2 cups all purpose flour: The structure of our cake.
- 2 cups granulated sugar: Provides sweetness and moisture.
- 0.75 cup black cocoa powder: Why this? Essential for the signature dark color and unique flavor profile.
- 2 tsp baking powder: Helps with the initial lift in the oven.
- 1.5 tsp baking soda: Reacts with the buttermilk for a tender crumb.
- 1 tsp fine sea salt: Sharpens the chocolate notes.
- 2 large eggs: Binds the batter together.
- 1 cup full fat buttermilk: Why this? The acid reacts with the soda to create a light texture.
- 0.5 cup neutral oil: Canola or vegetable oil works best here.
- 1 tbsp pure vanilla extract: Adds aromatic depth.
- 1 cup boiling water: Blooms the cocoa and thins the batter.
- 1.5 cups unsalted butter: For the silkiest frosting base.
- 4 cups powdered sugar: Gives the buttercream body.
- 0.5 cup black cocoa powder: For that matching dark frosting.
- 4 tbsp heavy cream: Makes the frosting light and spreadable.
- 1 pinch salt: Balances the sugar in the buttercream.
| Original Ingredient | Substitute | Why It Works |
|---|---|---|
| Buttermilk (1 cup) | Milk (1 cup) + 1 tbsp Lemon Juice | Mimics the acidity needed to activate the baking soda. |
| Black Cocoa Powder | Dark Dutch Process Cocoa | Still dark, though not obsidian; offers a more traditional flavor. |
| Neutral Oil | Melted Coconut Oil | Adds a very faint tropical note; cake may be firmer when cold. |
If you are planning a big dinner party and want to balance this decadent dessert with something lighter, I often serve a savory vegetable side earlier in the meal. My Roasted Broccoli recipe is a great way to get some greens on the table before diving into this rich chocolate heaven.
The Only Tools Needed for Success
You don't need a high end stand mixer for the cake layers themselves, though it certainly makes the frosting easier. The goal here is gentle mixing to avoid overworking the gluten, which can happen if you get too aggressive with a machine.
- Two 8 inch Cake Pans: The standard for a classic double layer look.
- Large Mixing Bowl: Plenty of room for whisking without a "flour explosion."
- Fine Mesh Sieve: Absolutely mandatory for black cocoa, which loves to clump.
- Wire Whisk: A sturdy whisk is better than a spatula for the "well" method.
- Parchment Paper: Don't skip this, or the dark, tender bottom will stick.
- Wire Cooling Rack: Essential for airflow so the cakes don't get "sweaty" bottoms.
- Offset Spatula: For getting that smooth, professional look on your obsidian frosting.
Chef's Tip: Freeze your butter for 10 minutes before starting the frosting, then let it sit at room temp for 5. It creates a "cool room temp" state that prevents the buttercream from becoming greasy or soup like.
step-by-step Guide to the Perfect Crumb

Right then, let's get into the actual baking. This is the part where your kitchen starts smelling like the inside of a chocolate factory. Pay close attention to the texture of the batter in step 4 it’s going to look very thin, but that is exactly what we want for a moist Black Chocolate Cake.
- Prep the environment. Preheat your oven to 350°F (175°C). Grease two 8 inch round cake pans and line the bottoms with parchment paper. Note: Parchment is non negotiable for this high moisture batter.
- Sift the dry base. Sift together the 2 cups all purpose flour, 2 cups granulated sugar, 3/4 cup black cocoa powder, 2 teaspoons baking powder, 1.5 teaspoons baking soda, and 1 teaspoon of sea salt into a large mixing bowl. Whisk until the color is a uniform charcoal grey.
- Incorporate the wet elements. Make a well in the center of the dry ingredients and add the 2 large eggs, 1 cup buttermilk, 0.5 cup neutral oil, and 1 tablespoon vanilla extract. Whisk from the center outward until the batter is thick, glossy, and smooth.
- Perform the hot bloom. Carefully pour in the 1 cup boiling water and whisk gently. Note: This will look alarming as the batter turns very liquid, but it's correct. Whisk until no streaks of water remain and the batter is obsidian dark.
- Bake the layers. Divide the batter evenly between the prepared pans. Bake for 30 minutes until a toothpick inserted into the center comes out clean and the edges pull slightly away from the pan.
- Cool with patience. Allow the cakes to cool in the pans for 10 minutes. Then, transfer to a wire rack to cool completely for at least 1 hour. The cake must be cold to the touch before frosting.
- Cream the butter base. Prepare the obsidian buttercream by beating the 1.5 cups softened butter with a hand mixer or stand mixer until it looks pale and incredibly fluffy.
- Build the frosting color. Gradually add the 4 cups powdered sugar and 0.5 cup black cocoa powder. Stream in the 4 tablespoons heavy cream and a pinch of salt. Beat until the frosting is light, airy, and the color of coal.
- Assemble the masterpiece. Place one cake layer on a plate, spread a thick layer of frosting, and top with the second cake. Use the remaining buttercream to coat the top and sides.
- Final set. Let the frosted cake sit for 20 minutes before slicing until the frosting has slightly crusted.
Solving Common Baking Hurdles and Texture Issues
Even the best bakers run into trouble sometimes. The most common issue with this specific cake is the "sink." Because the batter is so thin and the cocoa is so heavy, if your leavening agents (the powder and soda) are old, the cake won't have the strength to hold its shape.
Why Your Cake Sunk in the Middle
If your cake looks like a crater, it’s usually one of two things: either the oven door was opened too early, causing a temperature drop, or the baking soda has expired. Always check the "best by" date on your leavening agents.
A Black Chocolate Cake needs that chemical reaction to happen quickly and strongly to set the crumb before the heat of the oven evaporates the moisture.
My Frosting is Grainy or Grey
If your buttercream looks like wet cement rather than shiny obsidian, you likely need to sift your cocoa powder more thoroughly. Black cocoa is denser than natural cocoa and can form tiny beads of bitter powder if not integrated well.
If it's already mixed, try adding one more tablespoon of heavy cream and whipping it for another 3 full minutes on high speed to dissolve the sugar crystals.
| Problem | Root Cause | Solution |
|---|---|---|
| Cake is dry/crumbly | Overbaked or too much flour | Use a kitchen scale for flour; check doneness 5 mins early. |
| Layers are domed | Oven temp too high | Lower oven to 325°F and bake 5-10 mins longer next time. |
| Frosting is "breaking" | Butter was too cold | Microwave 1/4 cup of the frosting for 5 seconds and whip it back in. |
Common Mistakes Checklist
- ✓ Sift the black cocoa twice to ensure a velvety, clump free frosting.
- ✓ Use room temperature eggs so they emulsify properly with the oil and buttermilk.
- ✓ Tap the filled cake pans on the counter 3 times before baking to release large air bubbles.
- ✓ Ensure the boiling water is actually boiling this is what triggers the "bloom" of the cocoa oils.
- ✓ Never frost a warm cake; the high fat content in the buttercream will melt instantly.
Creative Ways to Personalize Your Dark Dessert
Once you've mastered the base recipe, you can start playing with the flavor profile. While the classic version is earthy and deep, adding a bit of acidity or fruit can really make the chocolate pop. My favorite way to serve this is with a side of tart raspberry coulis to cut through the richness.
The Black Magic Mocha Twist
Replace the 1 cup of boiling water with 1 cup of very strong, hot black coffee. The caffeine doesn't make the cake taste like coffee; instead, it acts as a molecular bridge that makes the chocolate taste "more like itself." It deepens the earthiness of the black cocoa and provides a slightly more complex aftertaste that adults particularly love.
gluten-free Adaptation
You can turn this into a gluten-free black velvet cake recipe by swapping the all purpose flour for a high-quality 1:1 gluten-free flour blend (like King Arthur or Bob’s Red Mill).
Because this is an oil based cake with a lot of moisture, gluten-free flours tend to behave very well here, avoiding the "gritty" texture sometimes found in GF sponges.
Best Practices for Freezing and Long Term Storage
Because this cake uses oil, it stays incredibly moist in the fridge. Butter based cakes tend to get hard when cold, but this one remains soft and snackable. This makes it an ideal candidate for meal prepping desserts or keeping on hand for a week of treats.
- Fridge: Store in an airtight container for up to 5 days. If the cake is cut, press a piece of plastic wrap directly against the exposed crumb to prevent it from drying out.
- Freezer: You can freeze the unfrosted layers for up to 3 months. Wrap them twice in plastic wrap and then once in aluminum foil. To thaw, leave them in the fridge overnight before frosting.
- Zero Waste Tip: If you have leftover frosting, don't throw it away! It makes an incredible "dip" for strawberries or can be sandwiched between two graham crackers for a quick midnight snack. You can also crumble any cake domes you trimmed off and mix them with a spoonful of frosting to make "Obsidian Cake Truffles."
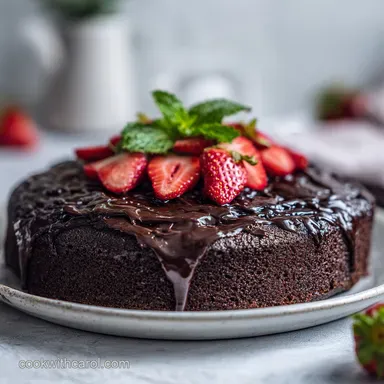
Elegant Ways to Garnish Your Finished Cake
The visual impact of a Black Chocolate Cake is its strongest suit, so the way you present it matters. I personally love the "less is more" approach. A simple dusting of edible gold luster dust or a few silver sprinkles can look like a galaxy against the dark frosting.
For a more natural look, use fresh blackberries or dark cherries. The deep purple of the fruit blends beautifully with the black cocoa. If you want to lean into the sophisticated vibe, try using a vegetable peeler on a block of white chocolate to create long, thin curls.
The stark contrast between the white chocolate and the dark cake is absolutely stunning on a dinner table.
Chef's Note: If you’re feeling extra, add a half teaspoon of espresso powder to the buttercream. It won't change the color, but it will make the frosting taste like a high end dark chocolate truffle.
At the end of the day, this cake is about more than just a recipe. It's about the feeling of creating something that looks impossible but tastes like home. Whether you're making it for a big event or just because you want to see if a cake can really be that dark, I hope it brings a bit of mystery and a lot of joy to your kitchen.
Happy baking!

Recipe FAQs
What is a black cake made of?
It relies on high-quality black cocoa powder and boiling water. These key ingredients, combined with buttermilk, oil, and flour, create the deep color and rich, moist texture characteristic of this cake.
Is dark cocoa the same as black cocoa?
No, they are distinct. Black cocoa has been alkalized much more heavily than standard dark cocoa, which gives it that signature midnight color and a smoother, less acidic flavor profile.
Why is it called black cake?
It earns its name from the ultra dark, obsidian appearance. This aesthetic is achieved solely through the use of heavy duty black cocoa powder, which provides a dramatic visual contrast compared to traditional light brown chocolate cakes.
How do I make my cake black?
Use exactly 3/4 cup of black cocoa powder in the batter. Ensure you sift the cocoa twice to remove clumps, which ensures the pigment is evenly distributed throughout the sponge.
Is it true the batter should be thin before baking?
Yes, this is completely normal. The batter becomes quite thin after you stir in the cup of boiling water, but this ensures a tender and moist final crumb after 30 minutes in the oven.
How to ensure the frosting stays black?
Beat 1/2 cup of black cocoa powder into your softened butter and powdered sugar. Keep the frosting at room temperature and apply only after the cakes have cooled for at least 1 hour to prevent the high fat buttercream from melting.
How to prevent the cake from sticking to the pan?
Grease your 8 inch pans thoroughly and line the bottoms with parchment paper. This extra step is non-negotiable for this recipe because the high moisture batter is delicate and prone to clinging to the metal.
Black Chocolate Cake Recipe
Ingredients:
Instructions:
Nutrition Facts:
| Calories | 572 kcal |
|---|---|
| Protein | 4.8 g |
| Fat | 29.3 g |
| Carbs | 77.8 g |
| Fiber | 3.5 g |
| Sugar | 58.2 g |
| Sodium | 385 mg |
