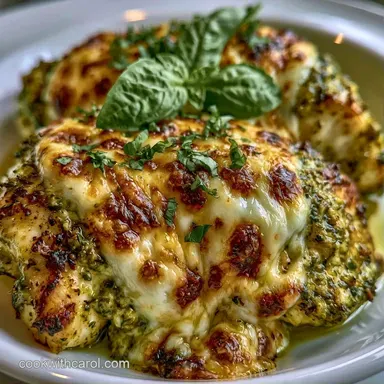
Juicy Baked Pesto Chicken with Mozzarella
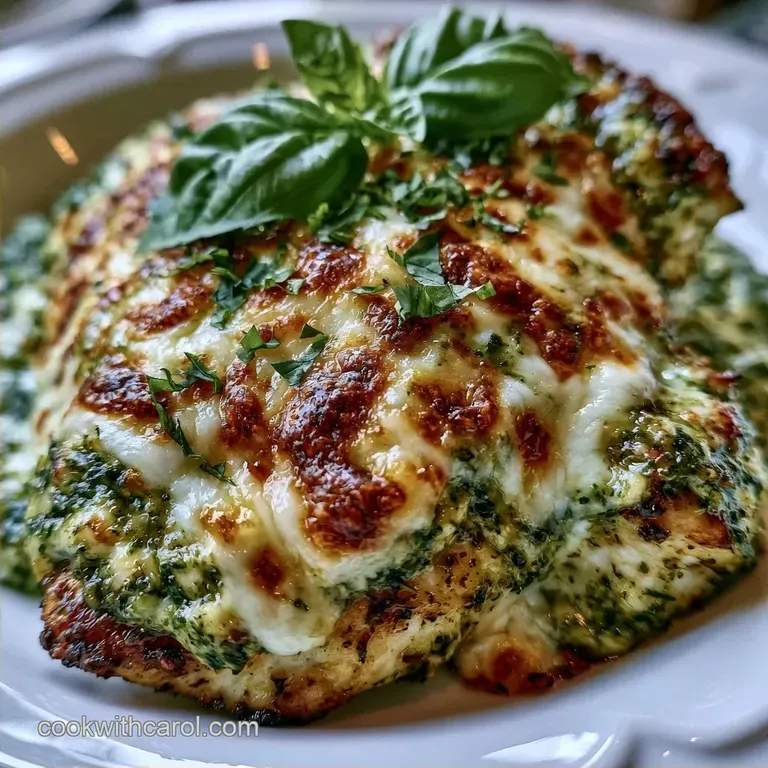
- Time: 5 min active + 25 min cook
- Flavor/Texture Hook: Zesty basil with gooey, melted cheese
- Perfect for: Busy weeknights or low carb meal prep
Have you ever wondered why home baked chicken breasts usually turn into dry, flavorless sponges? I spent years fighting that battle, thinking I just didn't have the "touch" for poultry. I'd follow the timers exactly, but the meat always felt fibrous and tough, like I was chewing on a workout mat.
Then I realized the problem wasn't the oven, it was the exposure. When a breast sits naked in a 400°F oven, the moisture evaporates almost instantly. The solution is simple: you need a protective shield.
That's where this Juicy Baked Pesto Chicken comes in. By sealing the meat under a layer of fat rich pesto and cheese, we create a little steam chamber that keeps the juices locked inside. It's a total shift in how to handle lean protein.
Why the Pesto Works
- The Moisture Barrier: Pesto consists of oil, nuts, and cheese, which creates a thick seal. This prevents the dry oven air from sucking the water out of the chicken.
- Carryover Cooking: We pull the meat at 160°F because the internal heat continues to rise while it rests. This ensures the center hits 165°F without the outer edges becoming rubbery.
| Method | Time | Texture | Best For |
|---|---|---|---|
| Oven Baked | 30 mins | Tender & Gooey | Family Dinners |
| Air Fryer | 20 mins | Charred & Firm | Single Servings |
Tools for the Job
No special equipment is required, though a couple of essentials help. I recommend a 9x13 inch baking pan to ensure the chicken has plenty of space. Overcrowding the pan leads to steaming rather than roasting, which means you'll miss out on that golden brown cheese.
A digital meat thermometer is your best friend here. I suggest avoiding the habit of cutting into the meat to check if it's done, as this allows the juices to escape. As noted by Serious Eats, using a probe thermometer is the most reliable way to get a perfect result every time.
Lastly, have a spatula or a small silicone brush handy. Use it to spread the pesto right to the edges of the chicken; any exposed areas are prone to drying out while baking.
Ingredient Choices
For the meat, I use boneless skinless chicken breasts. They cook fast, but they are unforgiving. If you find them too lean, you can use thighs, though they'll need a few extra minutes in the oven.
The pesto is where the flavor lives. I usually go for a high-quality store-bought version to save time, but homemade is great if you have a food processor. Look for one that uses olive oil and real pine nuts.
Mozzarella provides that classic pull, while the grated parmesan adds a salty, sharp punch. I prefer shredding my own mozzarella from a block. The pre shredded stuff is coated in potato starch to stop it from clumping, which means it doesn't melt as smoothly.
Recipe Basics
- Prep time: 5 minutes
- Cook time: 25 minutes
- Total time: 40 minutes
- Yield: 4 servings
Decision Shortcut: Extra zing? → squeeze half a lemon over it. More crust? → add 2 tbsp Panko. Less salt? → use homemade unsalted pesto.
Step by step Cooking
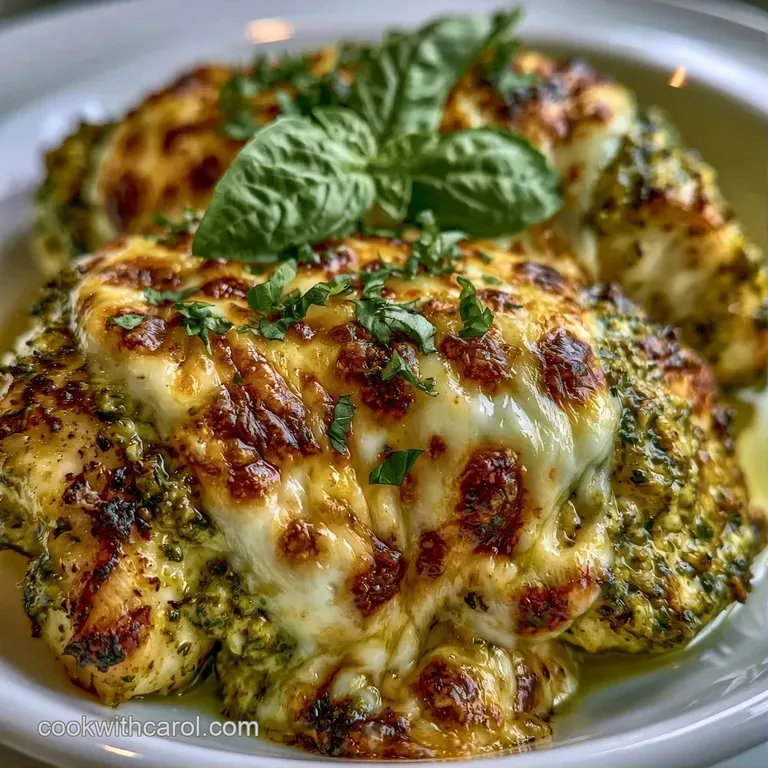
- Set your oven to 400°F (200°C).
- Rub 1 tbsp of olive oil across the bottom of a 9x13 inch baking dish. Note: This keeps the chicken from sticking to the ceramic.
- Wipe any excess moisture from the chicken breasts using paper towels. Note: Dried meat helps the pesto adhere instead of sliding off.
- Arrange the chicken breasts in the pan in a single layer.
- Spread 1/2 cup of pesto over each breast, using a brush or spatula to reach the edges.
- Evenly scatter 1 cup of shredded mozzarella and 1/4 cup of grated parmesan over the pesto.
- Bake on the center oven rack for 20–25 minutes until the cheese is bubbling and golden brown.
- Remove the pan when a meat thermometer shows the thickest part has hit 160°F (71°C).
- Let the meat rest in the dish for 5–10 minutes to reach a final internal temperature of 165°F (74°C).
- Sprinkle 1/4 cup of fresh basil leaves over the top before serving.
Handling Common Issues
Cheese Browning Too Fast
If your mozzarella is turning dark brown but the chicken still feels raw in the middle, just tent the dish with aluminum foil. This blocks the direct heat from the top element while the chicken continues to cook through. It's a lifesaver if your oven runs a bit hot.
Meat Feeling Rubbery
This usually happens when you overcook the protein. If you don't have a thermometer, start checking at 20 minutes. If you've overdone it, you can try slicing the meat thinly and tossing it with a bit of extra pesto or a splash of heavy cream to add moisture back in. For a different approach to texture, you might like my Pesto Chicken Parmesan Bake which uses a breading layer.
Watery Bottom of Pan
If you see a pool of liquid in the dish, it's likely because the chicken was too cold when it hit the oven or was patted insufficiently. Next time, let the meat sit at room temperature for 15 minutes before baking. You can also drain the excess liquid before serving so the sauce stays thick.
Saving and Reheating
Store remaining portions in a closed glass dish in the refrigerator for as long as 3 days. While the pesto stays fresh, the basil garnish tends to wilt, so it's best to add fresh leaves just before serving.
To freeze, make sure the chicken has cooled entirely. Wrap each breast firmly in aluminum foil and store them in a freezer bag for up to 2 months. For the best results when reheating, skip the microwave to avoid a rubbery texture.
Instead, warm them in a 325°F oven for roughly 15 minutes.
To stop any remaining pesto in the jar from oxidizing, pour a thin layer of olive oil over the surface before closing the lid. This oil seal blocks the air and prevents the basil from browning.
Adding Your Own Twist
If you want a more rustic feel, try using Baked Pesto Chicken Thighs instead of breasts. Thighs have more fat, so they are even harder to overcook. You'll just need to increase the bake time to about 30-35 minutes. If you're in a rush, my Air Fryer Pesto Chicken Thighs are a great alternative for a faster sear.
For a low carb or keto version, this recipe is already mostly there. Just ensure your pesto doesn't have added sugars. You can swap the mozzarella for provolone or fontina for a nuttier flavor profile.
If you're avoiding dairy, use a vegan pesto (made with nutritional yeast) and a cashew based mozzarella. The cooking time stays the same, but the browning on top will look a bit different.
What to Serve Alongside
Because this Juicy Baked Pesto Chicken is quite rich, I suggest pairing it with something bright or acidic to balance the flavors. My favorite is a simple arugula salad with a lemon vinaigrette and shaved parmesan; the peppery greens perfectly offset the sweetness of the basil.
If you prefer a heartier meal, try serving it over creamy polenta or al dente linguine. The melted cheese and chicken juices form a natural sauce that tastes wonderful when absorbed by the pasta.
Roasted cherry tomatoes are another fantastic addition. Simply pop them in the oven on a separate tray with garlic and olive oil for 15 minutes. The burst of acidity from the tomatoes makes the entire plate feel lighter and more cohesive.
You now have all the tips needed to keep your chicken perfectly tender. I highly recommend using a thermometer, as it's the only way to ensure your Juicy Baked Pesto Chicken stays succulent rather than becoming tough. I'd love to hear how yours turns out!
Recipe FAQs
Is it true that jarred pesto must be cooked before adding it to the chicken?
False. You can spoon it directly from the jar onto the raw meat. It cooks thoroughly during the 20-25 minute bake.
How to keep the pesto from sliding off the chicken?
Pat the meat dry with paper towels first. This allows the sauce to adhere better to the surface.
Can I use chicken thighs instead of breasts?
Yes, thighs work well and remain very juicy. If you enjoy this style of cooking, try our garlic parmesan chicken for another great option.
At what internal temperature should the chicken be removed from the oven?
Pull the meat when it reaches 160°F. The temperature will carry over to 165°F during the resting phase.
What consistency should the pesto have for best results?
Use a thick, paste like consistency. This prevents the sauce from running off and pooling at the bottom of the dish.
Which sides pair best with this chicken?
Serve it with a fresh garden salad or steamed vegetables. This cuts through the richness of the melted mozzarella and parmesan.
Why is the resting period important after baking?
Resting for 5-10 minutes lets the juices redistribute. This keeps the meat tender and ensures it hits the final 165°F mark.
Does the chicken need to be seared before baking?
Surprisingly, no. Baking at 400°F with a cheese topping creates a savory crust without the need for a skillet.
Juicy Baked Pesto Chicken