Crispy Buffalo Cauliflower Air Fryer

- Time: 5 minutes prep + 15 minutes cooking
- Profile: Zesty, spicy, and shatteringly crisp
- Perfect for: Tailgate snacks or a bold side dish
Buffalo Cauliflower Air Fryer
That sharp, vinegary scent hits you the second the glaze hits the heat. It's that instant "game day" feeling in the kitchen. For a long time, I thought you needed a deep fryer or a heavy batter to get that actual crunch.
Most people assume cauliflower is destined to be mushy once you add sauce. That usually happens because they use the oven, which steams the vegetable instead of searing it. I used to make this mistake constantly, ending up with a pile of orange, soft florets.
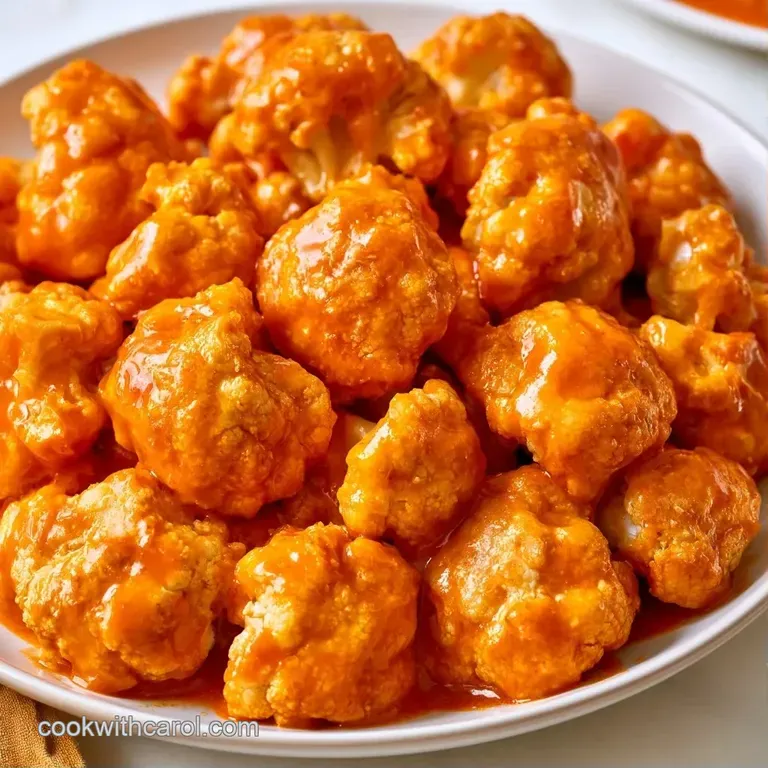
Switching to a Buffalo Cauliflower Air Fryer approach changes the result because the air moves so fast. It dries the surface instantly. You get a snack that actually holds its shape and packs a punch of heat.
Why This Version Works
- The Cornstarch Barrier: A light dusting of cornstarch absorbs surface moisture and creates a dry shell. This prevents the inside from leaking out and steaming the rest of the batch.
- Rapid Airflow: The concentrated heat blasts the florets from all sides. It's much faster than an oven, which means the vegetable doesn't have time to soften before the crust forms.
If you love this tangy, spicy profile, you'll probably love my Buffalo Chicken Mac and Cheese for a heartier meal.
Recipe Specs
The goal here is high heat and low moisture. If you crowd the basket, the air can't circulate, and you'll lose that crunch. Stick to a single layer for the best results.
The two stage cooking process is the real trick. First, we build the crunch. Then, we apply the glaze and do a quick "set" blast at 400°F to turn the sauce into a sticky lacquer.
Ingredient Deep Dive
Let's break down the key roles of each ingredient first.
| Component | Purpose | Substitute Notes |
|---|---|---|
| Cornstarch | Ensures a crunchy exterior | Potato starch or arrowroot are good alternatives |
| Buffalo Sauce | Provides the heat and tang | Sriracha mixed with a bit of vinegar |
| Honey | Offsets the spice and helps the coating cling | Maple syrup (gives a woody flavor) |
| Smoked Paprika | Adds a subtle charred scent | Standard paprika (less complex) |
I've noticed that the brand of buffalo sauce matters. Watery versions often result in soggy florets, so choose a sauce that is thick and lustrous.
Ingredients Needed
- 1 lb cauliflower florets, cut into bite sized pieces Pro Tip: Smaller chunks crisp more efficiently
- 2 tbsp extra virgin olive oil Reason: Ideal for air frying temperatures
- 2 tbsp cornstarch Reason: Draws out moisture for maximum crunch
- 1/2 tsp garlic powder Reason: Provides savory notes without scorching
- 1/2 tsp smoked paprika Reason: Mimics a grilled taste
- 1/4 tsp salt Reason: Brings out the other flavors
- 1/3 cup buffalo sauce Reason: The main source of heat
- 1 tbsp unsalted butter, melted Reason: Ensures a smooth sauce consistency
- 1 tsp honey Reason: Balances the vinegar's acidity
For a vegan version, agave is a great swap for honey. Ensure your butter replacement can withstand 400°F without breaking.
| Original Ingredient | Substitute | Why It Works |
|---|---|---|
| Cornstarch (2 tbsp) | Rice Flour (2 tbsp) | Comparable starch. Note: Results in a slightly grainier texture |
| Olive Oil (2 tbsp) | Avocado Oil (2 tbsp) | Better smoke point. Note: Taste is more neutral |
| Honey (1 tsp) | Maple Syrup (1 tsp) | Alternative liquid sweetener. Note: Adds a hint of maple flavor |
Essential Kitchen Tools
You can make this with basic gear. I typically use a basket style air fryer (like a Ninja or Cosori), but any similar model is fine.
A spacious mixing bowl is essential so you can toss the cauliflower thoroughly without losing the cornstarch coating. Using a silicone spatula is also a great way to ensure all the glaze makes it into the bowl.
Step-by-step Cooking
- Set the air fryer to 380°F (190°C). Note: A preheated basket helps prevent sticking
- In a large bowl, coat the cauliflower florets with olive oil until they are glistening.
- Stir in the salt, garlic powder, smoked paprika, and cornstarch. Toss well until a thin, matte paste covers each piece.
- Place the florets in the air fryer, making sure they are not overlapping. Cook for 10-12 minutes, shaking the basket midway through, until firm and golden brown.
- Combine the melted butter, honey, and buffalo sauce in a small bowl.
- Coat the hot, crunchy cauliflower in the buffalo glaze.
- Put the glazed florets back into the air fryer for 2 additional minutes at 400°F (200°C) until the sauce is sticky and lacquered.
Chef's Tip: If you have oversized cauliflower florets, chop them into uniform 1 inch pieces. This helps them brown evenly.
Fixing Common Problems
The most common issue is the texture. If the cauliflower feels spongy, it usually means too much moisture was trapped in the basket. Serious Eats' testing on similar vegetables shows that surface dryness is the most important factor for a crisp result.
Another annoyance is when the sauce slides right off the vegetable. This happens if the florets aren't hot enough when you toss them in the glaze, or if you skip the final 2 minute blast.
Soggy Bites
This usually happens from overcrowding. If the pieces touch, they steam. Cook in two batches if your air fryer is small.
Sauce Sliding
The glaze won't stick to cold vegetables. Toss them while they are screaming hot from the first fry.
Burnt Edges
If the tips are blackening too fast, your air fryer might run hot. Drop the temp to 360°F and add 2 minutes to the timer.
| Problem | Root Cause | Solution |
|---|---|---|
| Mushy texture | Overcrowded basket | Cook in smaller batches |
| Bland flavor | Not enough salt | Add a pinch more salt to the dry coat |
| Sauce is runny | Skipped final blast | Air fry at 400°F for 2 mins |
Best Serving Ideas
I always serve these with a side of cold celery sticks and a big bowl of blue cheese or ranch dressing. The cold, crisp veg balances the heat of the buffalo sauce.
For a full platter, add some carrot sticks and maybe some pickled jalapeños. If you're feeling fancy, a drizzle of extra ranch over the top of the cauliflower right before serving looks great.
| Method | Prep Time | Texture | Flavor Intensity |
|---|---|---|---|
| Air Fryer | 20 mins | Very Crisp | High |
| Oven | 35 mins | Soft/Tender | Medium |
Storage and Waste
Store any leftovers in a glass dish, lining it with a paper towel to keep them from getting damp. These will keep in the refrigerator for 3 days.
Avoid using a microwave to reheat, as it will make them mushy. Instead, place them in the air fryer at 350°F for 3-5 minutes to restore the crunch.
Don't discard the cauliflower stems. Peel away the tough outer skin, dice the core, and add it to a stir fry or soup. The flavor is similar to the florets, but the texture is denser.
Easy Flavor Twists
You can easily adapt this Buffalo Cauliflower Air Fryer recipe for different diets. For a Buffalo Cauliflower Air Fryer keto version, omit the cornstarch and honey. The result will be less "crunchy" and more "roasted," but the flavor remains.
If you want a Buffalo Cauliflower Air Fryer vegan option, just use a plant based butter. Most buffalo sauces are already vegan, but double check the label for honey or butter solids.
For those who want a different flavor entirely, try my Air Fryer Cauliflower for a more neutral, savory snack.
Quick Customization
- Extra tang? → fold in 1 tsp lemon zest
- More heat? → add 1/4 tsp cayenne to the dry coat
- Sweet & Spicy? → increase honey to 2 tsp
Diet Swaps
- gluten free: This recipe is naturally GF as long as your buffalo sauce is certified.
- No Breading: Skip the cornstarch for a lower carb, roasted style. Use 1 tbsp extra oil to help with browning.
Common Truths
People often think you have to batter these in a thick flour paste. That's a myth. A thick batter often traps steam inside, making the vegetable soggy. A light starch coating is actually more effective.
Another misconception is that buffalo sauce makes the veg soggy. It does if you just toss and serve, but that second blast of heat in the air fryer sets the sauce. It turns it into a glaze that clings to the crust.
Trust me on the cornstarch. It's the difference between a snack and a side of steamed vegetables. Right then, let's get frying.
Recipe FAQs
How do I get cauliflower crispy in the air fryer?
Toss florets in olive oil and cornstarch before air frying at 380°F. This creates a thin paste that crisps up during the 10-12 minute cook time.
How long does cauliflower take to cook in the air fryer?
Cook the florets for 10-12 minutes at 380°F, shaking halfway through. Return them for 2 more minutes at 400°F after glazing to set the sauce.
What's the best way to prepare the florets?
Dice the head into bite sized pieces to ensure everything cooks evenly. If you liked focusing on uniform sizes, you can use the same approach for our burrito bowls.
Is it true that crowding the basket saves time?
This one's false: Overcrowding traps steam and makes the cauliflower mushy. Arrange the pieces in a single layer for the best golden brown finish.
Why does my buffalo cauliflower turn out soggy?
Excessive sauce or overcrowding the basket usually causes a loss of crunch. Ensure you use a single layer and toss the florets in cornstarch first.
Buffalo Cauliflower Air Fryer