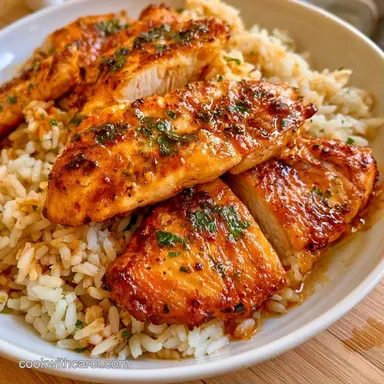
Healthy One Pan Chicken and Rice Bake
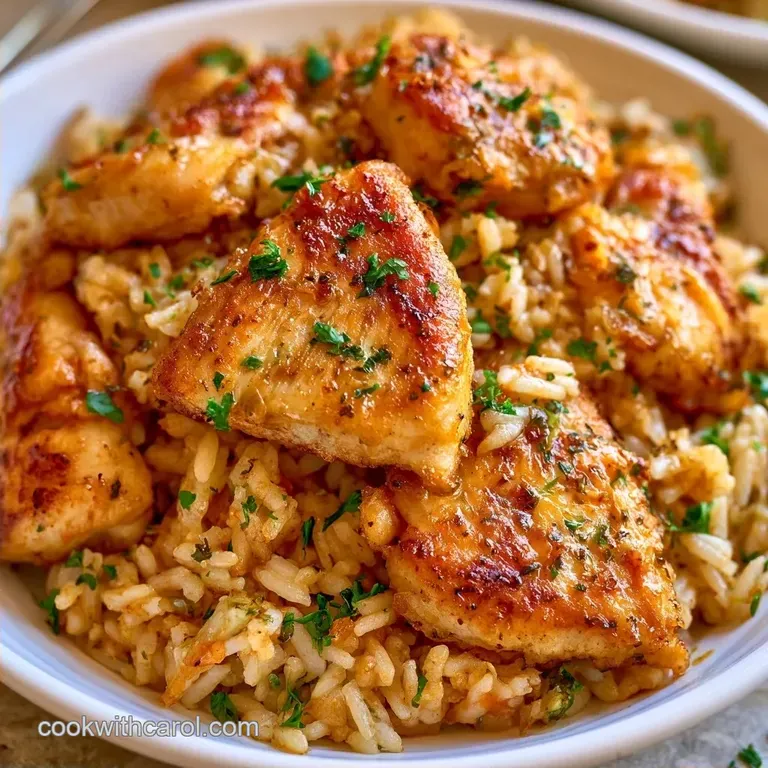
- Time: 15 min active + 45 min cook
- Flavor/Texture Hook: Mahogany crisp skin with fluffy, fragrant rice
- Perfect for: Busy weeknights or meal prep
- Easy One Pan Chicken and Rice
- Why This Method Actually Works
- Essential Tools for This Dish
- What Each Ingredient Does
- Ingredient List and Swaps
- Step-by-Step Instructions
- Avoiding Kitchen Disasters
- Storage & Reheating
- Flavor Variations to Try
- Perfect Complements
- High in Sodium
- Recipe FAQs
- 📝 Recipe Card
Easy One Pan Chicken and Rice
That loud, aggressive sizzle when skin on thighs hit a hot skillet is the best sound in the kitchen. It means the fat is rendering and you're about to get that deep, brown crust that makes a meal feel special.
I used to think one pot meals were a trap, usually resulting in gray meat and rice that had the consistency of wet cardboard.
I spent a while figuring out why my attempts always turned into porridge. The trick is resisting the urge to stir. When you mess with the rice while it's baking, you release too much starch, and that's where the gumminess comes from. By letting it sit under the chicken, the steam does the work.
This Chicken and Rice approach keeps things simple. You only need one oven safe pan, and the result is a cohesive dish where the rice absorbs all those savory drippings. It's honest, hearty food that doesn't require a dozen different bowls to prep.
Why This Method Actually Works
- The Initial Sear: Browning the chicken first creates a concentrated layer of flavor in the pan that the rice absorbs later.
- Undisturbed Baking: Leaving the rice alone in the oven prevents starch release, which keeps the grains distinct and fluffy.
- Skin Positioning: Keeping the chicken skin above the liquid line ensures it stays crisp instead of steaming into a soggy mess.
Essential Tools for This Dish
Any standard kitchen setup will work, provided you have an oven safe skillet. My top choice is a 12 inch cast iron pan, as it distributes heat evenly and moves effortlessly from the burner to the oven. A stainless steel pan with an oven proof handle is a great alternative.
For the rice, I suggest a fine mesh strainer. Rinsing the grains until the water runs clear removes the surface starch, which prevents the rice from becoming porridge like. Finally, a pair of tongs is the best tool for flipping the chicken without damaging the skin.
What Each Ingredient Does
Before we get into the list, it helps to know why these specific items are in the pan. The combination of smoked paprika and thyme gives the meat a woody, campfire depth that balances the brightness of the lemon we add at the end.
| Component | Purpose | Substitute Notes |
|---|---|---|
| Bone in Thighs | Adds fat and flavor to rice | Boneless thighs: cook 10 mins faster |
| Long grain Rice | Keeps grains separate | Basmati: works well, slightly nuttier |
| Chicken Broth | Primary cooking liquid | Water + bouillon: tastes slightly flatter |
| Smoked Paprika | Adds color and earthiness | Garlic powder: less depth, more savory |
Ingredient List and Swaps
Here is exactly what you need. I've included a few alternatives if your pantry is looking a bit bare.
- 4 (6 oz / 170g) bone in, skin on chicken thighs Why this? Bone in meat stays juicier during the oven phase.
- 1 tsp (5g) smoked paprika
- 1 tsp (5g) dried thyme
- 1/2 tsp (3g) salt
- 1/2 tsp (3g) black pepper
- 2 tbsp (30ml) olive oil (split into two uses)
- 1 1/2 cups (300g) long grain white rice Why this? Less starch than short grain, meaning fluffier results.
- 2 1/2 cups (600ml) low sodium chicken broth
- 1 medium (110g) yellow onion, finely diced
- 2 medium (60g) carrots, diced
- 3 cloves (9g) garlic, minced
- 1 bay leaf
- 2 tbsp (8g) fresh parsley, chopped
- 1 tbsp (15ml) fresh lemon juice
Substitution Guide
| Original Ingredient | Substitute | Why It Works |
|---|---|---|
| Long grain Rice | Jasmine Rice | Similar texture. Note: Use 1/4 cup less broth |
| Yellow Onion | Shallots | Finer flavor. Note: Use 4-5 large shallots |
| Chicken Broth | Vegetable Broth | Same liquid ratio. Note: Lacks the meatiness |
I've found that using a higher quality broth makes a noticeable difference here. If you're using a bouillon cube, just be careful with the extra salt in the seasoning.
Step-by-step Instructions
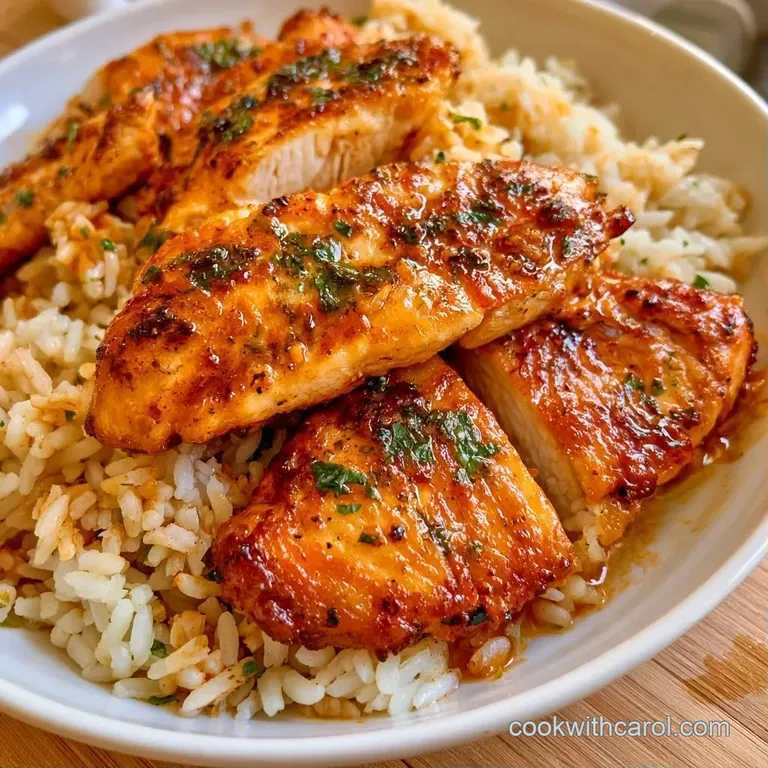
Let's get into it. Pay attention to the colors and smells - they tell you when to move to the next step.
Phase 1: Searing the Chicken
- Pat the chicken thighs completely dry with paper towels. Season both sides evenly with smoked paprika, dried thyme, salt, and black pepper. Note: Dry skin is the only way to get a real sear.
- Heat 1 tbsp (15ml) olive oil in an oven safe skillet over medium high heat.
- Place chicken skin side down. Sear for 5-7 minutes without moving them until the skin is mahogany colored and crisp.
- Flip the chicken and sear for another 2 minutes. Remove chicken from the pan and set aside on a plate.
Phase 2: Building the Flavor Base
- In the same pan with chicken drippings, add another 1 tbsp (15ml) olive oil if the pan looks dry. Sauté diced onion and carrots for 4-5 minutes until translucent and smelling sweet.
- Stir in minced garlic and cook for 60 seconds until fragrant but not brown.
- Add rinsed rice to the pan, stirring for 2 minutes until the edges of the grains look slightly translucent. Note: Toasting the rice adds a nutty flavor.
Phase 3: The One Pan Bake
- Pour in low sodium chicken broth and add the bay leaf. Stir once to scrape up the browned bits (fond) from the bottom.
- Nestle the seared chicken thighs on top of the rice, skin side up. Ensure the skin stays above the liquid line.
- Transfer the skillet to a preheated oven at 375°F (190°C) and bake for 25-30 minutes until the liquid is fully absorbed and the rice is tender.
Phase 4: The Finishing Touch
- Remove from oven and finish with fresh chopped parsley and fresh lemon juice. Note: The lemon juice cuts through the richness of the thighs.
Chef's Note: If you see the rice browning too quickly on the bottom but it's still hard, your pan might be too thin. Next time, use a heavier cast iron skillet to distribute the heat more evenly.
Avoiding Kitchen Disasters
Even with a straightforward Chicken and Rice meal, mistakes can happen. These are typically caused by improper heat control or incorrect liquid proportions. If the rice is still a bit firm, don't worry; you can easily resolve this with a bit of extra steam.
One common pitfall is the skin losing its crunch, which occurs if the chicken becomes submerged in the broth. Be sure the thighs sit on the rice instead of sinking into the liquid. For a different protein variation, you might like my pesto chicken thighs, which uses a different flavor profile but follows the same searing logic.
Fixing Grainy Texture
If the texture is too grainy, pour in 1/4 cup of hot broth, cover the skillet tightly with foil, and return it to the oven for 5-10 minutes. The resulting steam will finish cooking the grains without burning the bottom.
Preventing Burnt Bottoms
Stick to a heavy bottomed skillet. Thin pans are prone to "hot spots," which can scorch the rice before the center is done. If you notice a burning smell, move the pan to a lower oven rack immediately.
Maintaining Skin Crispness
Never use a lid while the dish is baking. Lids trap steam that drips back onto the chicken, turning the skin rubbery. Let the oven's dry heat maintain that crisp crust.
| Problem | Root Cause | Solution |
|---|---|---|
| Mushy Rice | Too much stirring or too much liquid | Rinse rice more thoroughly; don't stir during bake |
| Rubbery Skin | Pan was covered or chicken was submerged | Bake uncovered; keep skin above liquid |
| Undercooked Rice | Oven temp too low or not enough liquid | Add hot broth and steam for 10 mins |
Storage & Reheating
This Chicken and Rice is an excellent choice for meal prep. I often find it tastes even better the following day, as the rice has more time to absorb the rich chicken juices.
In the Fridge Keep leftovers in a sealed tub for a maximum of 4 days. The rice tends to harden in the cold, so adding a touch of liquid will help revive it.
In the Freezer This meal can be frozen for up to 2 months. If you have the room, I suggest freezing the chicken and rice in separate bags, though together is also fine. Just note that the skin will no longer be crispy.
Best Reheating Method Skip the microwave if possible. Instead, place a serving in a small skillet over medium heat with a splash of broth or water. Cover the pan for 3-5 minutes; this steams the rice back to a fluffy texture without drying the meat.
If you must use a microwave, cover the plate with a damp paper towel to keep the rice from becoming hard.
Zero Waste Tips If using a whole bird, don't toss the bones. Simmer them with carrot peels and onion scraps to create a quick stock for your next pot of rice. Finely chop any remaining parsley stems and sauté them with the onions at the start.
Flavor Variations to Try
While the classic version is great, you can easily tweak this to fit your mood. If you're looking for something with a different vibe, a lemon garlic chicken approach is a great way to lean into those citrus notes.
For a Mediterranean Twist
Swap the smoked paprika for 1 tsp of dried oregano. Add a handful of halved Kalamata olives and some diced red bell pepper to the onion and carrot sauté. Finish with crumbled feta cheese after the pan comes out of the oven.
For a Creamy Texture
Stir in 2 tbsp of heavy cream or a dollop of crème fraîche right before serving. This turns the dish into something closer to a risotto, though the texture remains slightly more distinct.
For a Fiber Boost
Replace half of the white rice with brown rice or farro. Keep in mind that these grains take longer to cook. You'll need to increase the broth by about 1/2 cup and extend the baking time by 15-20 minutes.
For Extra Veggies
Add diced zucchini or frozen peas during the last 10 minutes of baking. Zucchini can get mushy if it's in there the whole time, so adding it late keeps a bit of bite.
Method Comparison
| Feature | Stovetop Only | Oven Finish (This Recipe) |
|---|---|---|
| Skin Texture | Often softer/steamed | Mahogany and crisp |
| Effort | High (constant stirring) | Low (set and forget) |
| Rice Texture | More risk of gumminess | Fluffy and separate |
Perfect Complements
Since this Chicken and Rice dish is so satisfying, you'll want sides that provide a bright contrast. Fresh or acidic flavors help cut through the heartiness of the rice and the richness of the chicken thighs.
A peppery arugula salad with a zesty lemon dressing is my go-to. The citrusy notes act as a perfect palate cleanser. For a more filling option, sautéed spinach with garlic or steamed broccoli adds a lovely pop of color to the plate.
For an added crunch, some quick pickled red onions are an excellent choice. The tang of the vinegar balances the savory depth of the smoked paprika. Simply slice a red onion thinly and let it soak in apple cider vinegar and salt for 20 minutes.
Quick Decision Guide
- Want more freshness? → Add a side of steamed asparagus
- Need more heat? → Stir in 1/2 tsp of red pepper flakes with the garlic
- Want extra richness? → Serve with a side of garlic aioli for dipping the skin
High in Sodium
950 mg 950 mg of sodium per serving (41% 41% of daily value)
The American Heart Association recommends that most adults limit their sodium intake to 2,300 mg per day, with an ideal limit of 1,500 mg for most adults with hypertension.
Tips to Reduce Sodium
-
Swap Your Broth-30%
Replace the low-sodium chicken broth with no-sodium chicken broth or use water combined with extra aromatics.
-
Omit Added Salt-25%
Reduce or completely eliminate the 1/2 tsp of salt, as the broth and seasonings already provide a savory base.
-
Increase Acidity-10%
Add an extra tablespoon of fresh lemon juice at the end to brighten the flavors, which tricks the palate into needing less salt.
-
Boost the Aromatics
Double the smoked paprika, dried thyme, and garlic to add depth and complexity without adding any sodium.
Recipe FAQs
Can I cook chicken and rice in the same pan?
Yes, using an oven safe skillet. This method allows the rice to absorb the flavorful browned bits and chicken drippings for a richer taste.
Is it true you can just toss raw chicken and uncooked rice in a pan together?
No, and here's why. Searing the chicken first is essential to develop a mahogany colored crust and ensure the meat is cooked safely while the rice simmers.
What is the serving size for one pan?
One pan provides 4 servings. This typically includes one bone-in chicken thigh and a generous portion of the savory rice per person.
How to bake chicken thighs for maximum crispiness?
Pat the skin completely dry with paper towels before seasoning. Sear skin side down in olive oil for 5-7 minutes before transferring the skillet to the oven.
Is this a 4-ingredient chicken and rice recipe?
False. To achieve the depth of flavor in this version, we use a combination of aromatics like onion, carrots, and garlic along with chicken broth.
How long do chicken thighs cook in the oven?
Bake for 25-30 minutes at 375°F. Make sure the chicken skin remains above the liquid line so it stays crisp while the rice absorbs the broth.
Why is my baked chicken still red inside?
The meat has not reached the safe internal temperature. Continue baking for a few more minutes or use a meat thermometer to ensure the thickest part of the thigh is fully cooked.
Which side dish pairs best with this meal?
A fresh, zesty salad. If you love the brightness of lemon in this dish, see how we use a similar acid balance in our classic Italian side salad.
One Pan Chicken And Rice