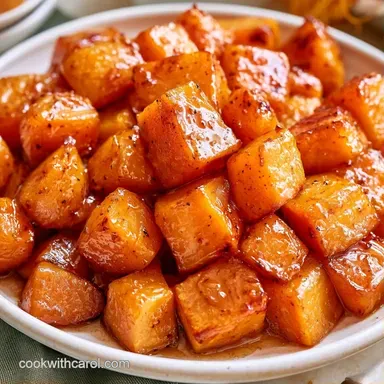
Maple Roasted Butternut Squash Side Dish
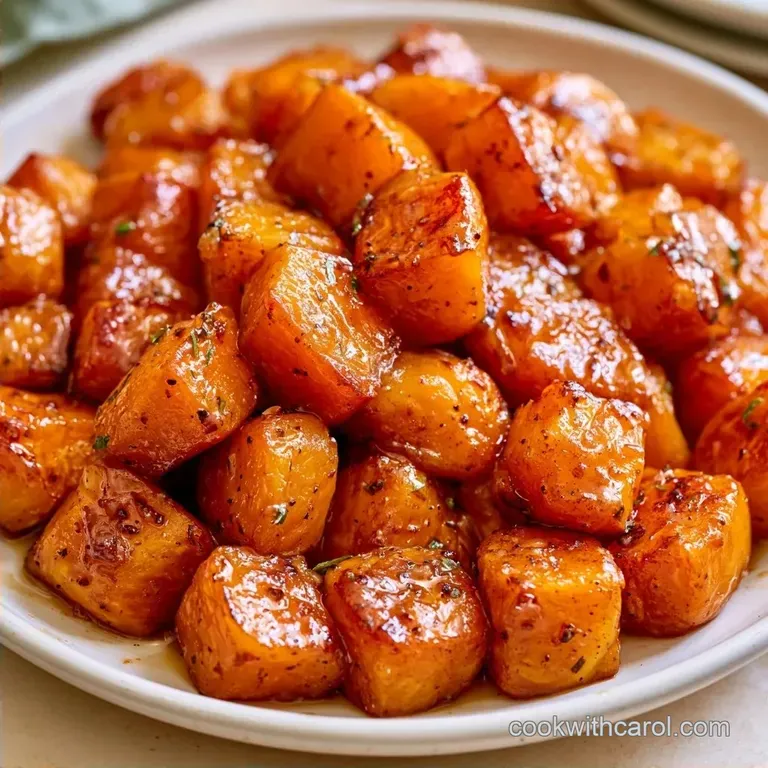
- Time: 15 min active + 35 min roasting
- Flavor/Texture Hook: Sweet maple glaze with a salty, nutty crunch
- Perfect for: Holiday dinners, Sunday roasts, or cozy autumn meal prep
There's nothing like the aroma of brown butter and cinnamon wafting from a hot oven to signal the arrival of fall. I spent years roasting my squash at low temperatures for an hour, which only resulted in limp, pale cubes that felt more steamed than roasted.
Everything changed once I bumped up the heat and delayed the glaze until the final stretch.
This has become my go-to potluck contribution because the platter is always empty by the end of the night. The key is treating the roasting and the glazing as two distinct steps. This ensures a deep, mahogany colored crust while the center remains soft and succulent.
Whether you're preparing a feast for a crowd or just looking for a nutritious butternut squash side for a weekday meal, this approach is foolproof. It's a straightforward process, but precision with the clock is vital. Whatever you do, don't ignore those last five minutes in the oven.
Roasted Butternut Squash Side Dish
Let's dive into the specifics. While this isn't a completely hands off process, it's still quite simple; you just need to stay mindful of the timing and the browning on the edges.
The secret lies in stirring in the maple syrup and butter while the squash is piping hot from the first roast. That residual heat ensures the glaze clings to the vegetable instead of just collecting at the bottom of the pan.
If you're pairing this with a rich meal, such as roast pork loin, the sweetness provides a great contrast to the fat.
For more autumn inspired ideas, you might enjoy my squash soup as a starter. But when it comes to the main attraction, this roasted version is the way to go.
Why This Method Works
I've spent a lot of time messing with oven temps, and here is what actually matters:
- High Heat: Roasting at 400°F triggers the natural sugars to brown quickly, which creates flavor before the squash overcooks.
- The Double Bake: Adding the glaze at the end prevents the syrup from burning, which usually happens if you roast it for 30 minutes straight.
- Airflow: Leaving space between the cubes prevents them from steaming, ensuring you get a crust instead of a mash.
Gather Your Ingredients
Avoid using low-fat oils for this dish. You need a fat that can withstand the roasting temperature and enhance the flavor profile.
| Component | Purpose | Substitute Notes |
|---|---|---|
| Butternut Squash | Base and natural sweetness | Kabocha squash: a nuttier, denser choice |
| Maple Syrup | Glaze and caramelization | Honey: a thicker, floral alternative |
| Unsalted Butter | Richness and gold color | Coconut oil: a great dairy-free option |
| Fresh Rosemary | Savory balance to the sugar | Fresh sage: another autumn favorite |
The Main List
- 3 lbs butternut squash, peeled and cubed into 1 inch pieces Note: Uniform sizes ensure an even roast
- 3 tbsp extra virgin olive oil Note: A clean taste that handles high heat
- 1 tsp kosher salt
- ½ tsp cracked black pepper
- 2 tbsp pure maple syrup Note: Real syrup browns better than the imitation kind
- 2 tbsp unsalted butter, melted
- ½ tsp ground cinnamon
- ¼ tsp nutmeg
- 2 tbsp fresh rosemary, finely chopped
- 1 tbsp toasted pecans, crushed
Quick Flavor Tweaks
- Want it sweeter? → add 1 tbsp brown sugar
- Looking for spice? → add 1/4 tsp cayenne
- Want a bright finish? → squeeze half a lemon over the top
The Gear You'll Need
Basic tools are all that's required here. A large rimmed baking sheet is a must; overcrowding the squash in a small pan will only lead to a soggy result.
I suggest lining the pan with parchment paper. This keeps the maple syrup from sticking to the metal and makes the washing up much faster. A deep, wide bowl is also helpful for tossing the squash without sending pieces flying onto the floor.
Fresh vs Pre cut
| Source | Prep Time | Texture |
|---|---|---|
| Fresh Squash | 15 mins | Firmer, better roast |
| Pre cut Cubes | 2 mins | Softer, higher moisture |
Steps from Prep to Plate
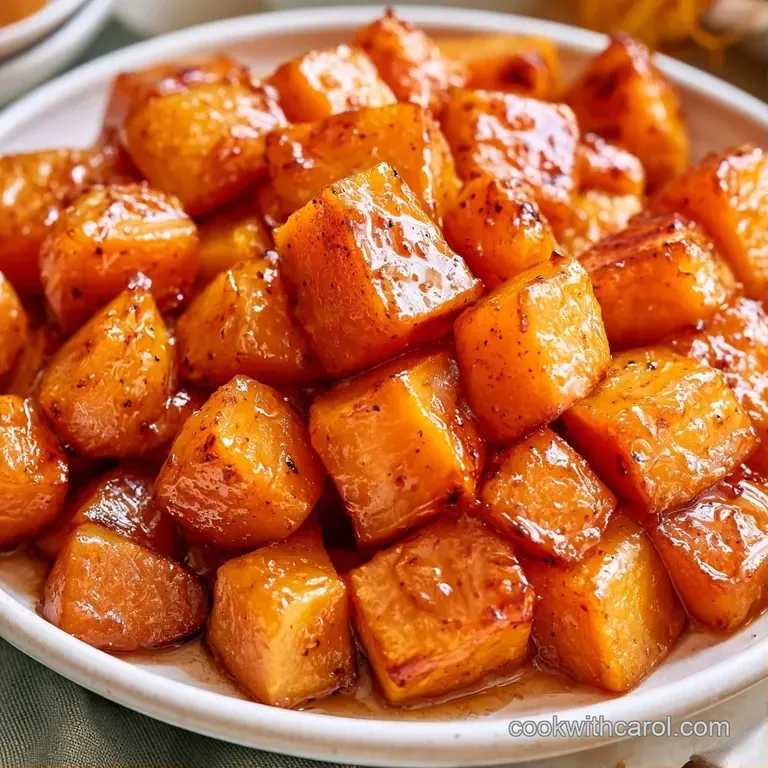
Time to get started. Follow these instructions and keep an eye on the visual indicators.
1. The Precision Prep
Set the oven temperature to 400°F (200°C). Prepare a large rimmed baking tray by covering it with parchment paper.
2. The First Toss
In a spacious mixing bowl, combine the cubed butternut squash with olive oil, salt, and pepper. Stir until each piece is well coated. Note: The oil helps create a crisp crust.
3. The Space Out
Arrange the squash on the baking tray in a single layer, ensuring the pieces aren't crowding each other.
4. The First Roast
Bake for 25–30 minutes, flipping the pieces at the halfway mark. Cook until edges are deeply browned and the centers are velvety.
5. The Glaze Mix
Take the pan out of the oven. While the squash is still hot, pour over the melted butter and maple syrup, then sprinkle with nutmeg and cinnamon.
6. The Coat
Gently toss the squash directly on the tray to ensure the glaze covers every piece.
7. The Final Bubble
Place the pan back in the oven for another 5 minutes. Roast until the sugars bubble and tack onto the squash.
8. The Final Touch
Remove from the heat. Top immediately with crushed toasted pecans and fresh chopped rosemary.
Fixing Common Roast Issues
Things can go sideways if the oven is too crowded or the heat is off. Here is how to handle it.
Squash is Too Mushy
This usually happens because the pan was overcrowded. When cubes touch, they release steam and boil each other. If you're making a double batch, use two separate pans. You can also try roasting for 5 minutes less next time.
Edges are Burnt
If the edges are black but the center is hard, your oven might run hot. Lower the temp to 375°F (190°C) and extend the time by 10 minutes. Also, check that your maple syrup isn't pooling in one spot on the pan.
Too Much Oil
If the squash feels greasy, you've used too much oil. The cubes should be coated, not swimming. Next time, use a salad spinner or a paper towel to dry the squash cubes before adding the oil.
Ways to Mix it Up
This Butternut Squash Side Dish is a great base for other flavors. If you want something more savory, swap the maple syrup for a drizzle of balsamic glaze and use thyme instead of rosemary.
For a spicy version, add a pinch of smoked paprika to the first toss. This gives it a woody, campfire vibe that pairs great with grilled meats. If you're vegan, just use a dairy-free butter substitute and the result is practically the same.
If you have leftover roasted cubes, don't throw them away. Blend them with a bit of broth and coconut milk to make a quick squash soup.
2 Diet Swaps
- Low Sugar: Replace maple syrup with a touch of apple cider vinegar and extra cinnamon.
- Nut Free: Swap the pecans for toasted pumpkin seeds (pepitas) for a similar crunch.
Saving and Reheating Leftovers
Store the roasted squash in a sealed glass tub for up to 4 days in the fridge. Be careful not to stack them too deep, or the bottom layer will get smashed.
For the freezer, let the squash cool completely. Spread them on a tray to freeze individually for 2 hours, then move them to a freezer bag. They'll keep for 3 months.
The Best Reheat
Avoid the microwave if you can. It makes the squash rubbery. Instead, put them back in the oven at 350°F (175°C) for 10 minutes. This brings back the crisp edges and wakes up the maple glaze.
Nutty Roast Seed
Don't toss the squash seeds! Clean them, toss them with a bit of oil and salt, and roast them at 325°F (160°C) for 15 minutes. It's a great zero waste snack.
Serving and Plating Tips
When you pull the pan out, move the squash to a wide ceramic platter. Don't heap them into a deep bowl, or the steam will soften the crust you worked so hard to get.
Scatter the rosemary and pecans over the top right before serving. This keeps the herbs bright green and the nuts crunchy. This dish pairs beautifully with a crisp side salad to balance the sweetness.
Savory Meat Pairings
This Butternut Squash Side Dish is a natural partner for roasted chicken, seared scallops, or a thick pork chop. The maple notes play well with any protein that has a salty or smoky rub.
What Nobody Tells You
Most recipes just tell you to toss and bake. But the physics of the pan actually matter.
- The Sugar Factor: Maple syrup burns at a much lower temperature than squash browns. Adding it at the end is the only way to get a glaze that isn't bitter.
- Surface Area: 1 inch cubes are the sweet spot. Any larger and the center stays raw; any smaller and they shrivel up into raisins.
- Fat and Heat: The butter added at the end doesn't just add flavor. It emulsifies with the syrup to create that glossy, professional finish.
Recipe FAQs
What pairs nicely with butternut squash?
Roasted pork or a herb crusted chicken complement the sweetness perfectly.
Tip: keep the squash warm in the oven while finishing your main protein.
How to prepare this squash as a side dish?
Toss cubed squash in olive oil and roast at 400°F for 25 30 minutes.
Tip: flip the pieces halfway through to get deep browning on all sides.
Which method creates the best texture?
High heat roasting produces a caramelized exterior and a velvety center.
Tip: cut squash into exact 1 inch pieces for uniform cooking.
Is it true that butternut squash must be boiled before roasting?
Actually, no. Roasting raw cubes preserves the flavor and prevents a soggy texture.
Tip: peel the squash completely to ensure the skin doesn't stay tough.
Does crowding the pan avoid steaming?
That's a myth. Overcrowded pans trap moisture, which prevents the squash from browning.
Tip: use a large rimmed baking sheet to leave space between cubes.
Why did my roasted squash turn out mushy?
The cubes were likely too small or the pan was too full.
Tip: use parchment paper to help the heat circulate more efficiently.
Could I use a different variety of squash?
You can use zucchini or pumpkin for a similar autumn side.
Tip: if you like this method, try our roasted zucchini squash for a quicker alternative.
How to get the maple glaze to tack onto the squash?
Drizzle syrup and butter over hot cubes and bake for 5 final minutes.
Tip: garnish with fresh rosemary and crushed pecans immediately after removal.
Maple Roasted Butternut Squash