Gluten Free Honey Bread: Pillowy and Soft
- Time:15 minutes active + 45 minutes rising + 60 minutes baking = Total 120 minutes
- Flavor/Texture Hook: Pillowy, springy, and subtly sweet
- Perfect for: School lunches, morning toast, or a cozy sandwich
- Baking the Legit Squishy Soft White Gluten Free Bread Recipe with Honey
- The Quick Look Recipe Blueprint
- The Secret to That Springy Texture
- Essential Tools for Your Kitchen
- The Step-by-Step Baking Flow
- Solving Your Common Bread Problems
- Troubleshooting Common Issues
- Customizing Your Homemade Loaf
- Keeping Your Bread Fresh
- Ways to Enjoy Your Loaf
- Recipe FAQs
- 📝 Recipe Card
Baking the Legit Squishy Soft White gluten free Bread Recipe with Honey
That smell of warm honey and yeast hitting the air is just a different kind of magic. I remember the first time I tried to bake without gluten, and honestly, it was a disaster. I ended up with something that had the texture of a wet sponge and the taste of a cardboard box.
I thought the "bread" I was making was just supposed to be a dense, heavy thing you tolerate for the sake of your diet.
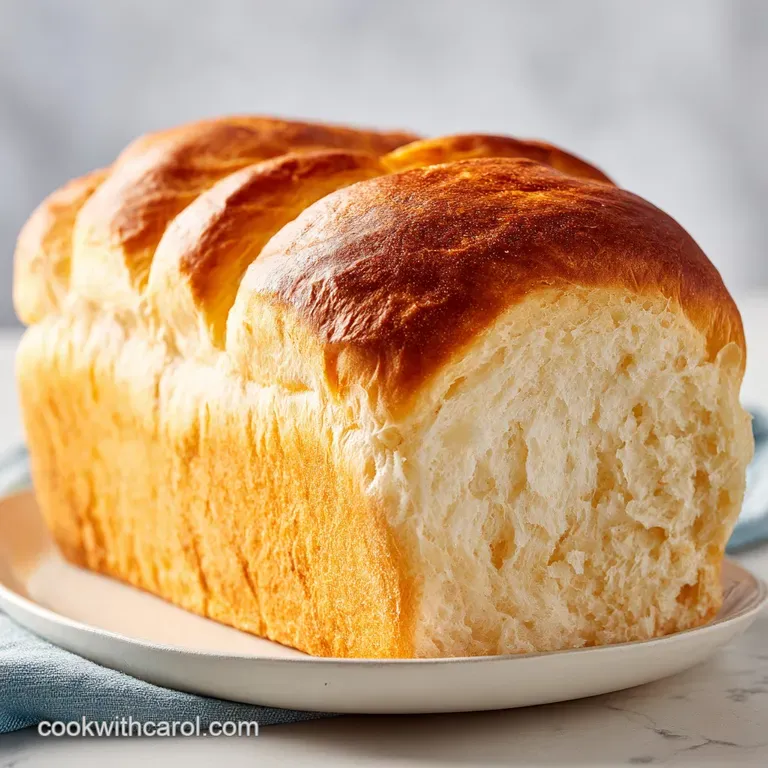
But you don't have to settle for that. Forget the myth that gluten free bread is destined to be a doorstop. This is the only Legit Squishy Soft White gluten free Bread Recipe with Honey you need for a perfectly soft loaf. We're aiming for that squishy, cloud like feel that actually bounces back when you press it.
Right then, let's get into the flow. We're combining a few clever tricks, like apple cider vinegar and honey, to mimic the stretch and moisture that wheat usually provides. You'll get a mahogany crust and a velvety interior that actually holds up to a toaster.
The Quick Look Recipe Blueprint
Since we're following a plan based execution, it's best to look at this in three distinct phases. First, we handle the assembly, then we let the yeast do the heavy lifting, and finally, we hit the oven. Trust me on this, skipping the rise time is the fastest way to end up with a brick.
- 1. Prep Flow (15 minutes)
- Whisking dry ingredients, blending the wet mix, and combining them into a glossy batter.
- 2. Rise Flow (45 minutes)
- Letting the dough relax and expand in a warm, draft free corner of the kitchen.
- 3. Finish Flow (60 minutes)
- Baking until the top is a deep gold and cooling on a rack to set the structure.
But what about the method? Some people ask if they can do this on a stovetop in a Dutch oven. While the oven is the standard, a Dutch oven can create a different crust.
| Method | Time | Texture | Best For |
|---|---|---|---|
| Standard Oven | 60 min | Soft, uniform crust | Sandwich loaves |
| Dutch Oven | 65 min | Thicker, crustier exterior | Rustic style |
The Secret to That Springy Texture
I used to wonder why some GF breads felt like cake while others felt like bread. It comes down to how we manage the moisture and the air bubbles. Here is what's actually happening inside your loaf:
- Moisture Magnet: Honey doesn't just add sweetness, it's a humectant. This means it grabs onto water and holds it, which prevents the bread from drying out the second it leaves the oven.
- The Acid Boost: Apple cider vinegar reacts with the baking powder. This creates extra little carbon dioxide bubbles, giving the bread a more open, airy feel.
- Structure Support: Xanthan gum acts as the "glue" that gluten usually provides. It traps the gas from the yeast, allowing the bread to rise without collapsing.
- Fat Barrier: The neutral oil coats the flour particles, ensuring the crumb stays velvety rather than gritty.
| Component | Science Role | Pro Secret |
|---|---|---|
| Honey | Moisture retention | Use a mild honey to avoid overpowering the bread |
| ACV | pH Balance/Lift | Prevents the "yeasty" aftertaste often found in GF bakes |
| Xanthan Gum | Elasticity | If your flour blend already has it, you can skip the extra tsp |
| Eggs | Binding & Protein | Room temperature eggs integrate better into the batter |
Essential Tools for Your Kitchen
You don't need a professional bakery to pull this off, but a few specific tools make the process a lot smoother. I've found that using a wet spatula is a total life saver when dealing with GF dough, which is more like a thick cake batter than a traditional kneadable dough.
For the mixing, a stand mixer such as KitchenAid is great for getting that glossy finish, but a hand mixer or even a sturdy whisk and some elbow grease will work. You'll definitely want a 9x5-inch loaf pan, as this ensures the bread climbs upward rather than spreading outward.
Also, make sure you have a wire cooling rack. If you leave the bread in the pan, the bottom will steam and get soggy, which ruins that lovely mahogany crust we're aiming for.
The step-by-step Baking Flow

Let's crack on with the actual making. Remember, we aren't kneading this like traditional dough. We're mixing it until it's smooth and glossy.
- Combine the gluten-free flour, xanthan gum, instant yeast, baking powder, and fine sea salt in a large bowl, whisking to ensure no clumps remain. Note: Whisking aerates the flour for a lighter loaf.
- In a separate jug, whisk together warm water, honey, neutral oil, eggs, and apple cider vinegar until the honey is fully dissolved.
- Pour the wet ingredients into the dry ingredients and mix on medium speed for 3-5 minutes until the dough is glossy and smooth.
- Spoon the dough into a greased 9x5-inch loaf pan and smooth the top with a wet spatula. Note: The water prevents the dough from sticking to the tool.
- Cover with a clean cloth and let the dough rise in a warm, draft free spot for 30-45 minutes until it rises just above the rim of the pan.
- Preheat the oven to 350°F (175°C).
- Bake on the center rack for 50-60 minutes until the top is mahogany colored and the bottom sounds hollow when tapped.
- Remove from the pan immediately and transfer to a wire cooling rack to cool completely before slicing.
Chef's Note: Don't be tempted to slice into this while it's hot. I've done it! The interior is still setting, and if you cut it too early, you might get a gummy texture. Wait at least an hour.
Solving Your Common Bread Problems
Baking gluten-free can be finicky. Sometimes the humidity in your kitchen or the specific brand of flour you use can change the outcome. If your loaf isn't behaving, it's usually a simple fix.
Troubleshooting Common Issues
| Issue | Solution | ||
|---|---|---|---|
| Why Your Bread Is Too Dense | This usually happens if the yeast didn't wake up or if the dough wasn't mixed long enough. You need that 3-5 minute mix to build the structure. If the water was too hot, it might have killed the yeast | ||
| Why the Top Is Cracking | A deep crack on top often means the oven was too hot or the bread rose too quickly. It still tastes great, but for a smoother top, make sure your oven is properly preheated and you're using a center r | ||
| Why the Crumb Feels Gummy | This is the classic "cut too soon" problem. gluten-free starches need to fully set as they cool. If you slice it while steaming, the moisture traps inside and creates that sticky feel. | Problem | Roo |
Customizing Your Homemade Loaf
Once you've nailed the base, you can start playing with the flavors. I love adding things to the dough to make it more interesting. For a savory twist, you can fold in some dried rosemary or garlic powder.
If you're looking for other gluten-free treats to pair with this, you might like these moist banana muffins for a sweet breakfast spread.
For those who want to swap ingredients, keep in mind that GF baking is all about ratios. If you change one thing, it might affect the rise.
| Original Ingredient | Substitute | Why It Works |
|---|---|---|
| Honey (1/4 cup) | Maple Syrup (1/4 cup) | Similar liquid sugar content. Note: Adds a distinct maple flavor |
| Neutral Oil (1/4 cup) | Melted Butter (1/4 cup) | Same fat content. Note: Richer taste, slightly denser crumb |
| Apple Cider Vinegar | Lemon Juice (1 tsp) | Same acidity to activate baking powder. Note: Very subtle citrus hint |
| 2 Large Eggs | Flax Eggs (2 tbsp ground flax + 6 tbsp water) | Provides binding. Note: Bread will be heavier and less "squishy" |
If you want a more protein heavy morning, try serving slices of this bread alongside some pancake sausage muffins for a full brunch.
Keeping Your Bread Fresh
Gluten-free bread tends to stale faster than wheat bread because it doesn't have the same moisture holding proteins. To keep this loaf squishy, you have to be smart about storage.
Storage Guidelines:
- Countertop: Keep in an airtight bag for up to 2 days.
- Fridge: I don't recommend the fridge, as it can actually make the starches crystallize and feel hard.
- Freezer: This is the secret. Slice the bread first, then freeze the slices with parchment paper between them. They'll last for 3 months.
Zero Waste Tips: Don't throw away the ends! The "heels" of the loaf make the best garlic toast. Just brush them with butter and garlic, then sear them in a pan. If the bread does get a bit firm, a quick 10 second zap in the microwave or a toast in the toaster brings that velvety texture right back.
Ways to Enjoy Your Loaf
Now that you have a Legit Squishy Soft White gluten free Bread Recipe with Honey in your repertoire, the possibilities are endless. Because it's a white bread, it's a blank canvas.
The Classic Sandwich
This bread is sturdy enough for a classic club sandwich. Use plenty of mayo or avocado to add extra creaminess, which complements the slight sweetness of the honey.
The Gourmet Toast
Since the crumb is so springy, it toasts beautifully. Try it with salted butter and a drizzle of more honey, or go savory with smashed avocado, red pepper flakes, and a squeeze of lime.
French Toast Twist
Because of the honey and egg content, this bread makes a killer French toast. Dip thick slices in a cinnamon vanilla egg wash and fry in butter until golden. It absorbs the custard without falling apart, which is a common struggle with other GF breads.
Recipe FAQs
How to make gluten-free bread spongy?
Mix the dough on medium speed for 3-5 minutes. This builds the structure needed for a squishy texture. Ensure the dough rises for 30-45 minutes in a warm spot before baking.
What does honey do for gluten-free bread?
Honey acts as a natural humectant. It attracts and retains moisture, which keeps the bread soft. It also provides essential sugars to feed the yeast.
What is the secret to making the softest bread?
Use a combination of honey and apple cider vinegar. These ingredients keep the crumb tender and prevent the bread from becoming dense. If you enjoyed the moisture balance here, see how we use a similar approach to keep things creamy in our overnight oats.
What is the trick to making good gluten-free bread?
Mix until the dough is glossy and smooth. Most gluten-free breads fail because they are under mixed. A full 3-5 minute mix on medium speed is essential for the correct texture.
How should I store leftovers?
Store slices in an airtight container at room temperature. For longer preservation, freeze slices in airtight bags. Toast them directly from the freezer to restore the original softness.
Why is my gluten-free bread too dense?
Verify your water temperature. Water that is too hot kills the yeast, while water that is too cold prevents it from activating. Both result in a heavy loaf that fails to rise.
Is it true that any gluten-free flour works for this recipe?
No, this is a common misconception. You must use a gluten-free all-purpose flour blend combined with xanthan gum. Without the gum, the bread will lack the structure to hold air bubbles.
Soft White gluten free Bread

